Create an API token
If you plan to use the Cloudflare API to manage your account programmatically, you need an API token (or API key) to authenticate your requests.
The benefit of an API token - as opposed to an API key - is that you can limit tokens to specific permissions, zones, IP addresses, and a specific validity period.
-
Determine if you want a user token or an account owned token. If you are developing a new service that you want multiple superadministrators to use and the endpoints that you are calling are compatible with account owned tokens, the option exists to use account tokens that are not connected to a specific user.
-
From the Cloudflare dashboard ↗, go to My Profile > API Tokens for user tokens. For Account Tokens, go to Manage Account > API Tokens.
-
Select Create Token.
-
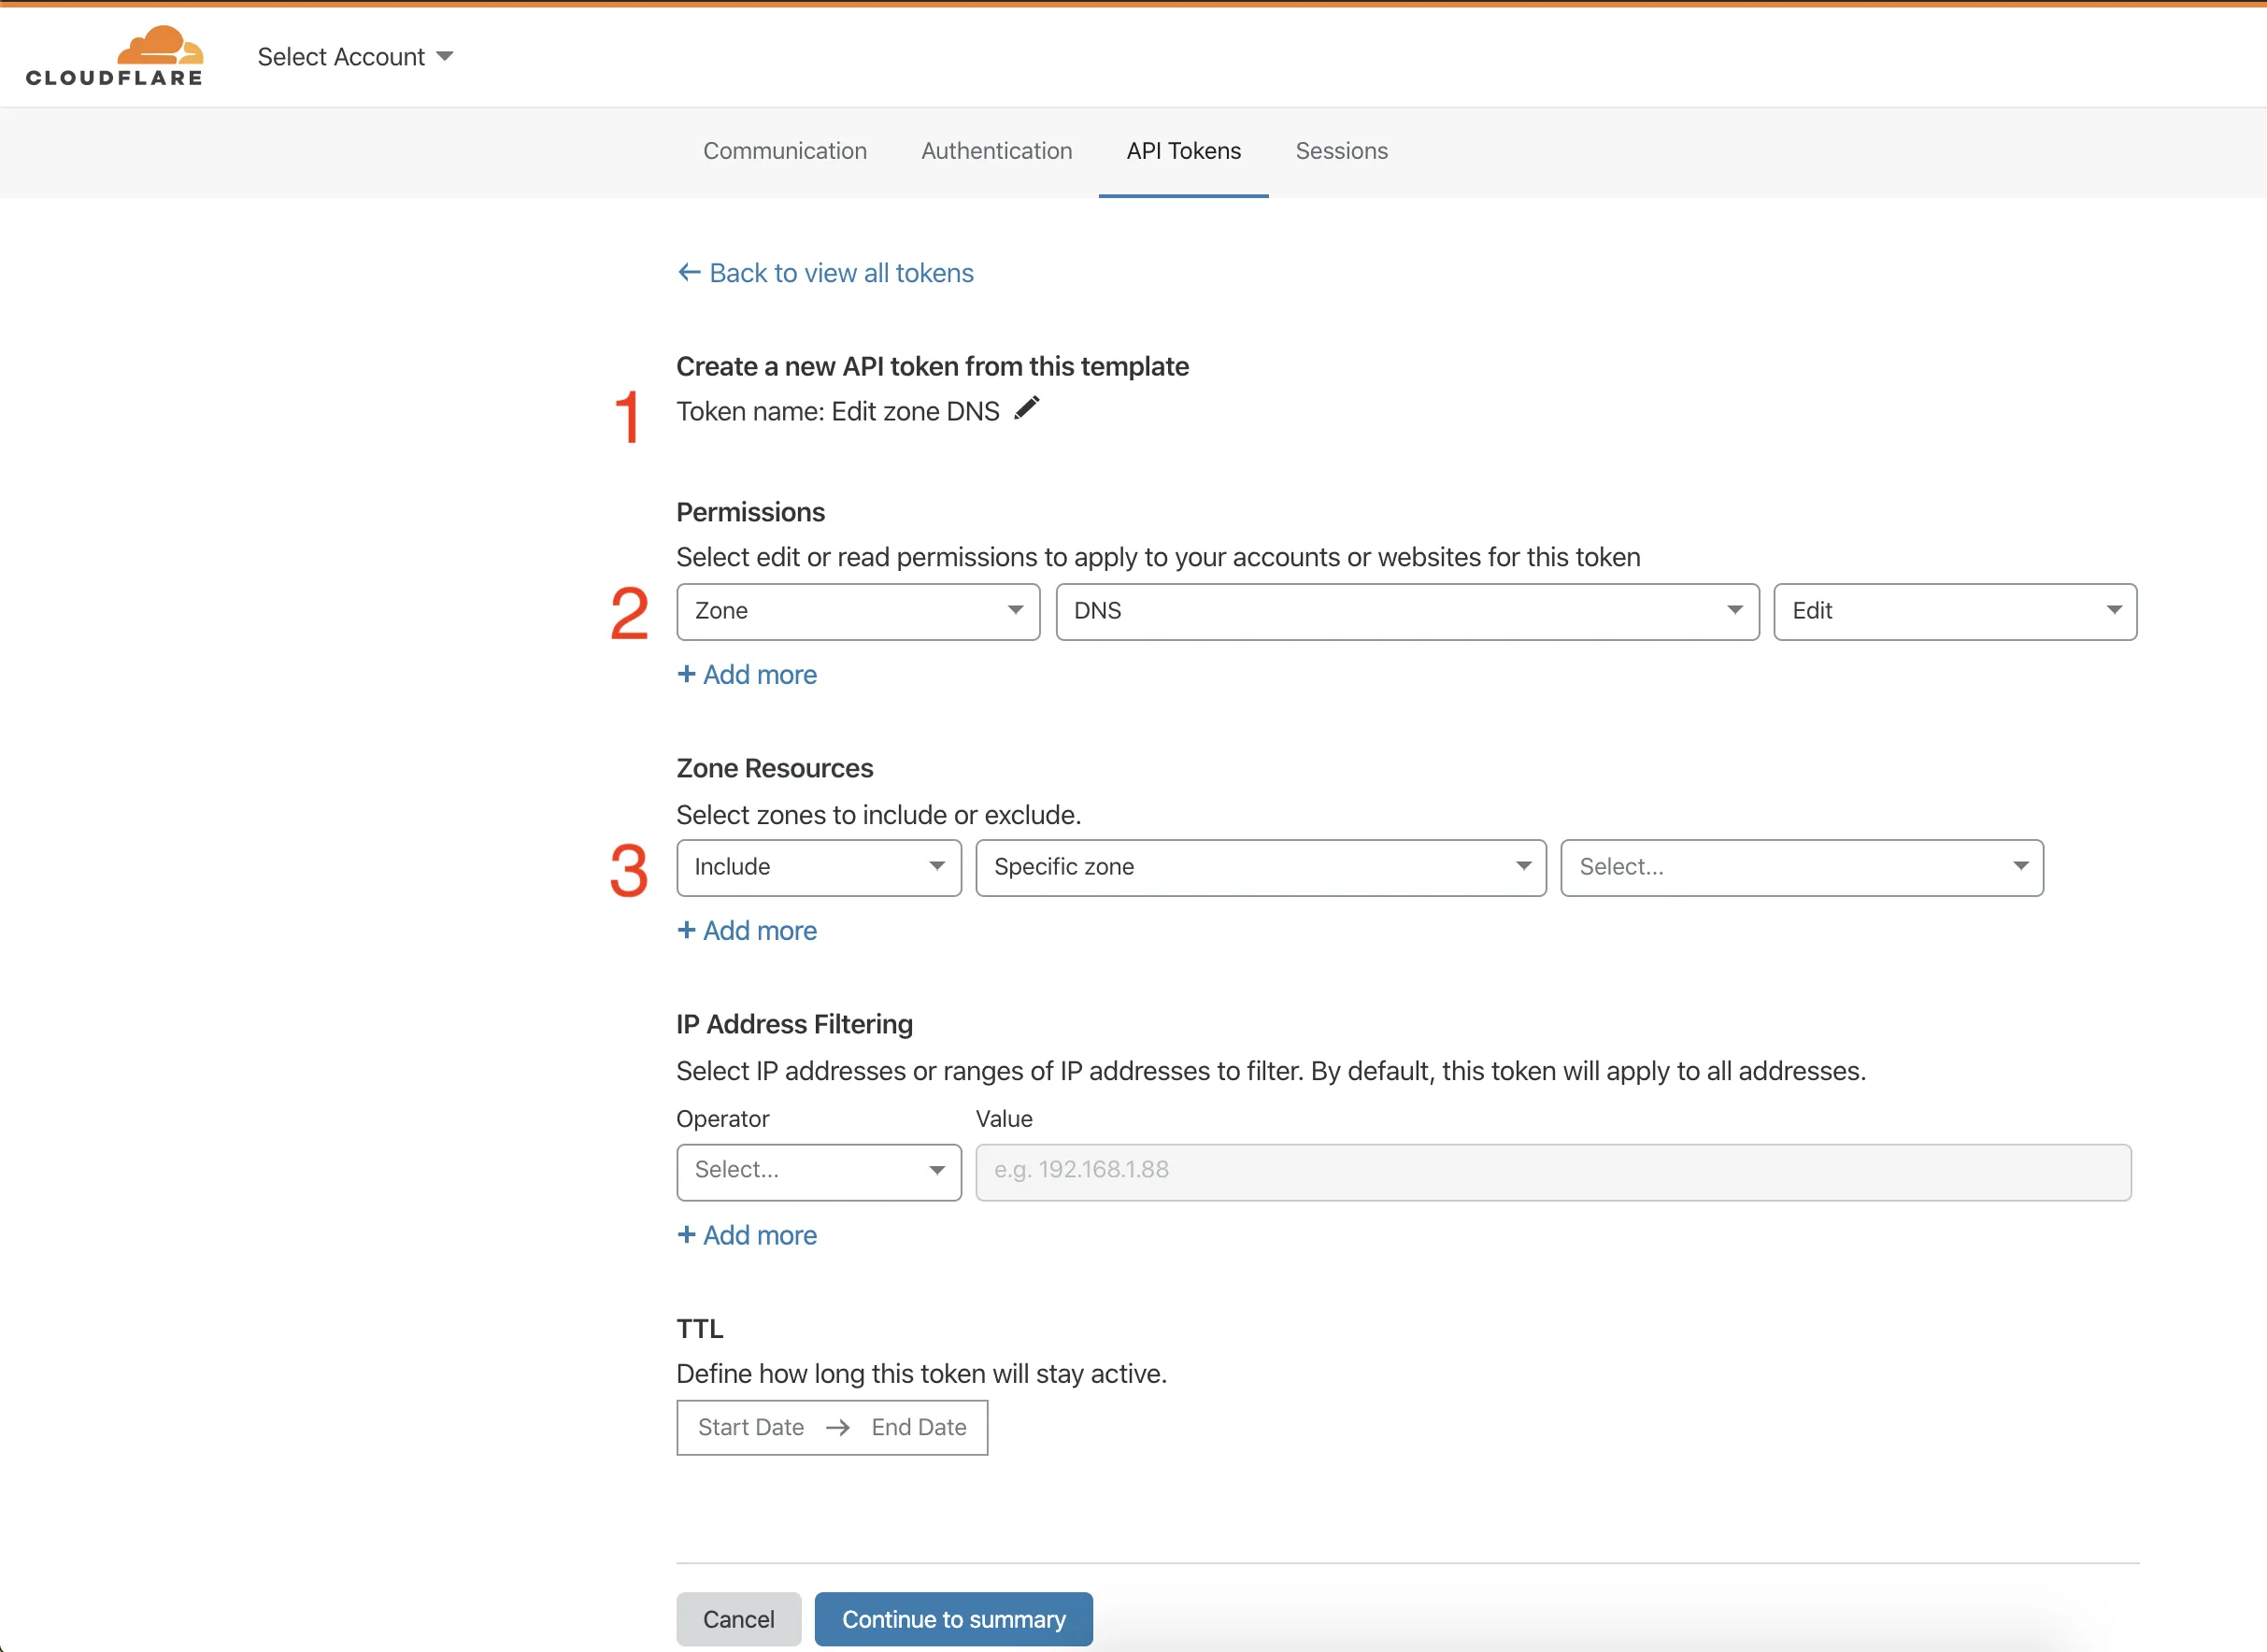
Select a template from the available API token templates or create a custom token. The following example uses the Edit zone DNS template.
-
Add or edit the token name to describe why or how the token is used. Templates are prefilled with a token name and permissions.
-
Modify the token’s permissions. After selecting a permissions group (Account, User, or Zone), choose what level of access to grant the token. Most groups offer
EditorReadoptions.Editis full CRUDL (create, read, update, delete, list) access, whileReadis the read permission and list where appropriate. Refer to the available token permissions for more information. -
Select which resources the token is authorized to access. For example, granting
Zone DNS Readaccess to a zoneexample.comwill allow the token to read DNS records only for that specific zone. Any other zone will return an error for DNS record reads operations. Any other operation on that zone will also return an error. -
(Optional) Restrict how a token is used in the Client IP Address Filtering and TTL (time to live) fields.
-
Select Continue to summary.
-
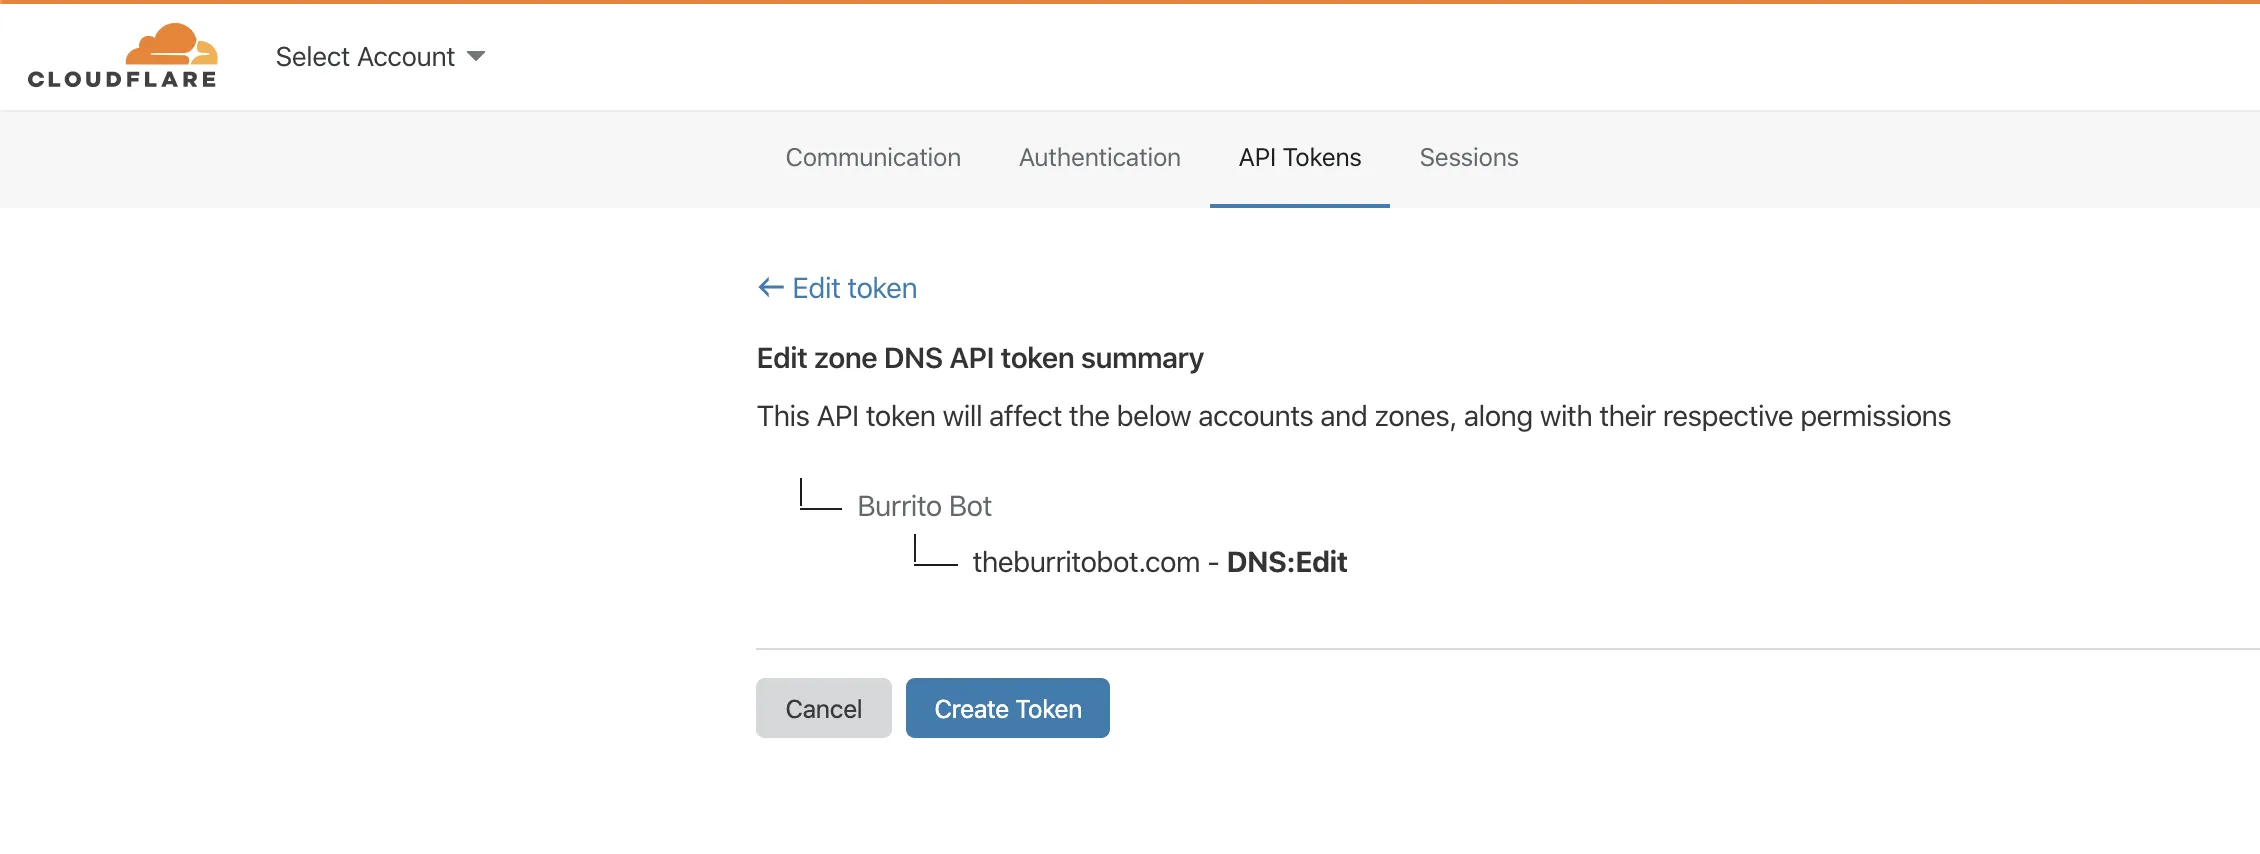
Review the token summary. Select Edit token to make adjustments. You can also edit a token after creation.
-
Select Create Token to generate the token’s secret.
-
Copy the secret to a secure place.
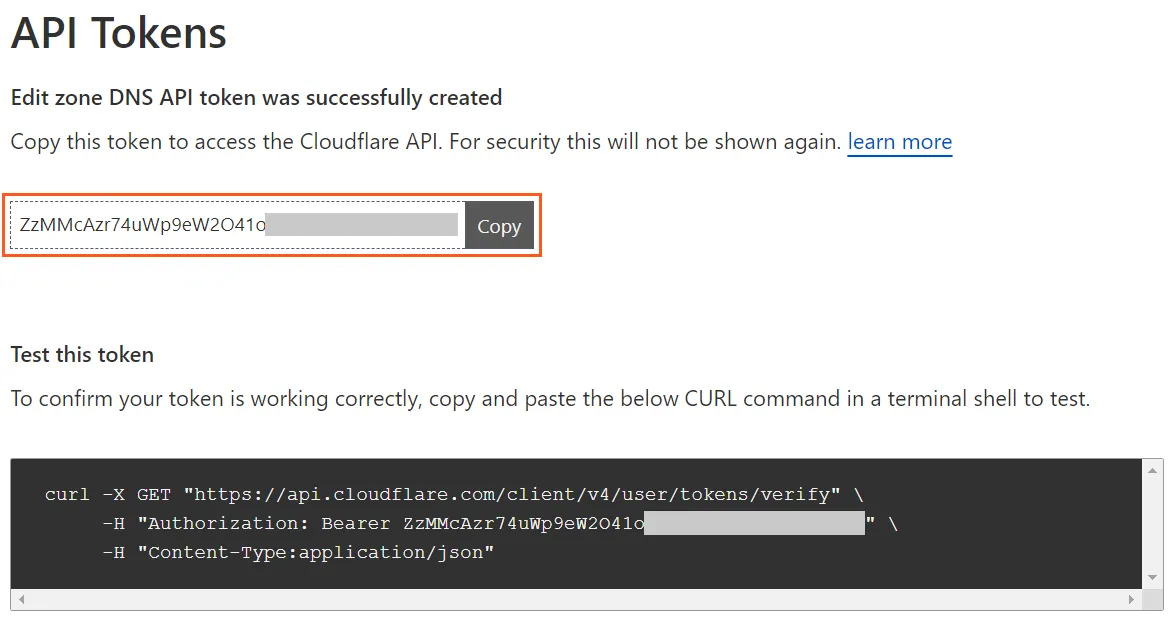
The token secret page also includes an example command to test the token. Use the /user/tokens/verify endpoint to fetch the current status of the given token.
curl "https://api.cloudflare.com/client/v4/user/tokens/verify" \--header "Authorization: Bearer <API_TOKEN>"The result:
{ "result": { "id": "100bf38cc8393103870917dd535e0628", "status": "active" }, "success": true, "errors": [], "messages": [ { "code": 10000, "message": "This API Token is valid and active", "type": null } ]}With this you have successfully created an API token and can start working with the Cloudflare API. After creating your first API token, you can create additional API tokens via the API.